How to Optimize PDFs for Commercial Printing withAdobe Acrobat Pro

A Step-by-Step Guide from AV Graphics
Sending a file to print isn’t as simple as attaching a PDF and hitting “send.” A PDF that looks great on your screen isn’t always ready for professional printing. Without the right color settings, font embedding, and image resolution, even well-designed PDFs can cause print issues.
A PDF/X file is a safer, print-ready file of your PDF that helps commercial printers produce your job accurately the first time. Think of PDF/X as a “locked” version of your PDF that prevents fonts, colors, or images from changing during printing. The good news: Adobe Acrobat Pro can do most of the work of converting your PDF automatically.
This guide is written for non-designers and non-print professionals. You don’t need to understand printing terms or adjust advanced settings—Adobe Acrobat handles that for you.
Why PDF Optimization for Print Matters
Before sending your files to a commercial printer like AV Graphics, optimizing your PDF ensures:
Faster processing - Smaller file sizes upload and process more quickly
Fewer errors - Proper optimization catches potential print issues early
The best quality - Ensures images, fonts, and colors print as intended
Cost savings - Helps avoid prepress charges, reduces the risk of reprints, and keeps your project on schedule — saving both time and money.
Let’s walk through how to optimize your PDF for professional printing using Adobe Acrobat Pro.
Before you start
You’ll need:
Adobe Acrobat Pro, not Adobe Acrobat reader.
Your original PDF file (from InDesign, Illustrator, Photoshop, etc.)

Step 1: Open Your PDF in Acrobat Pro
Open Adobe Acrobat Pro
Open your PDF (File 🠖 Open)
Quickly check your PDF:
Does everything look correct?
Are images clear?
Are all pages present?
Is the page size correct? If yes, continue.
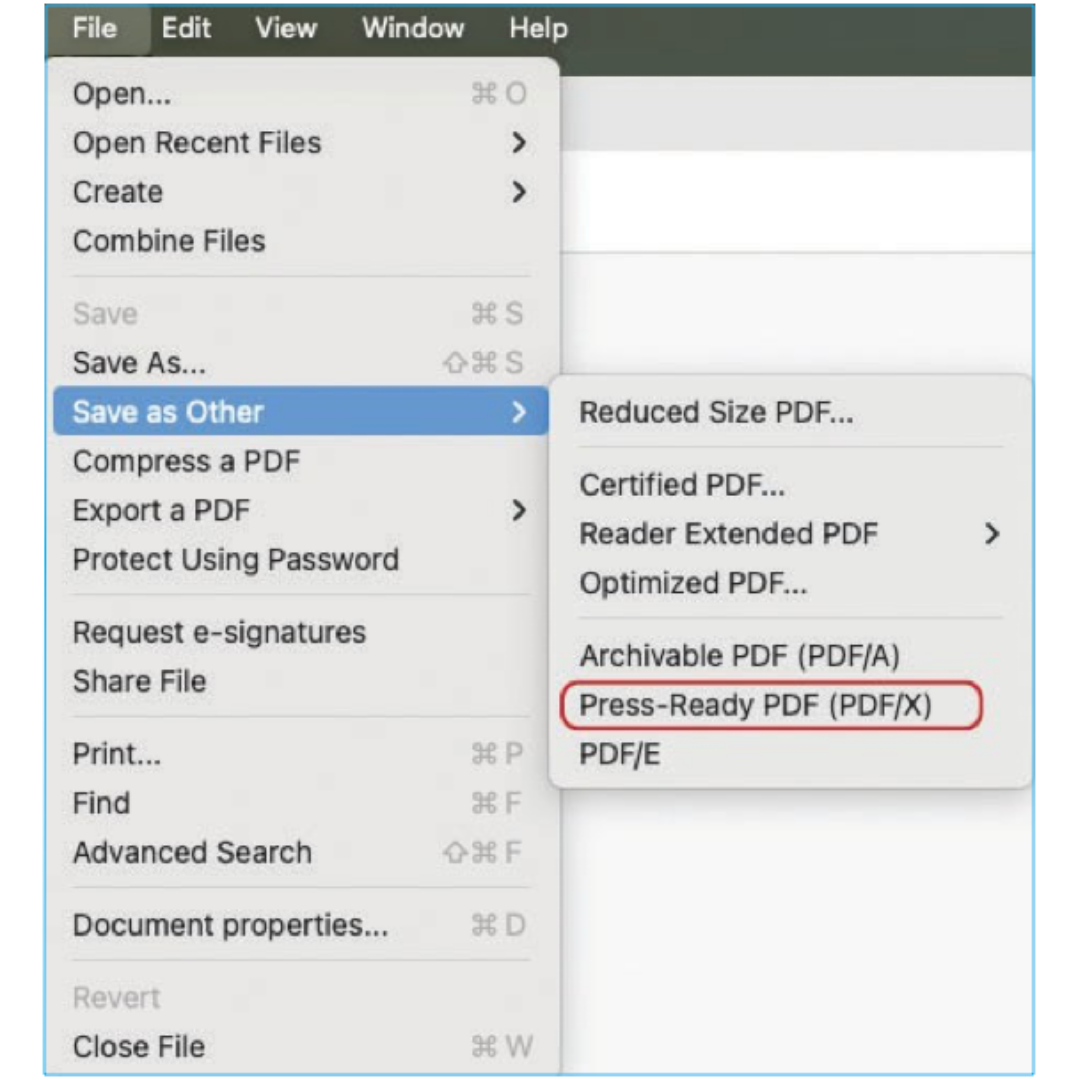
Step 2: Save a Press-Quality Copy
This step prepares your file for printing and does not change your design.
Click File
Choose Save As Other
Select Press Ready PDF
Save the file with a new name, such as: ProjectName_PRESS.pdf
✅ Important: Keep this newly saved file open — this is the file you’ll convert to PDF/X next.
You don’t need to adjust any settings or options at this step. Acrobat handles this automatically.
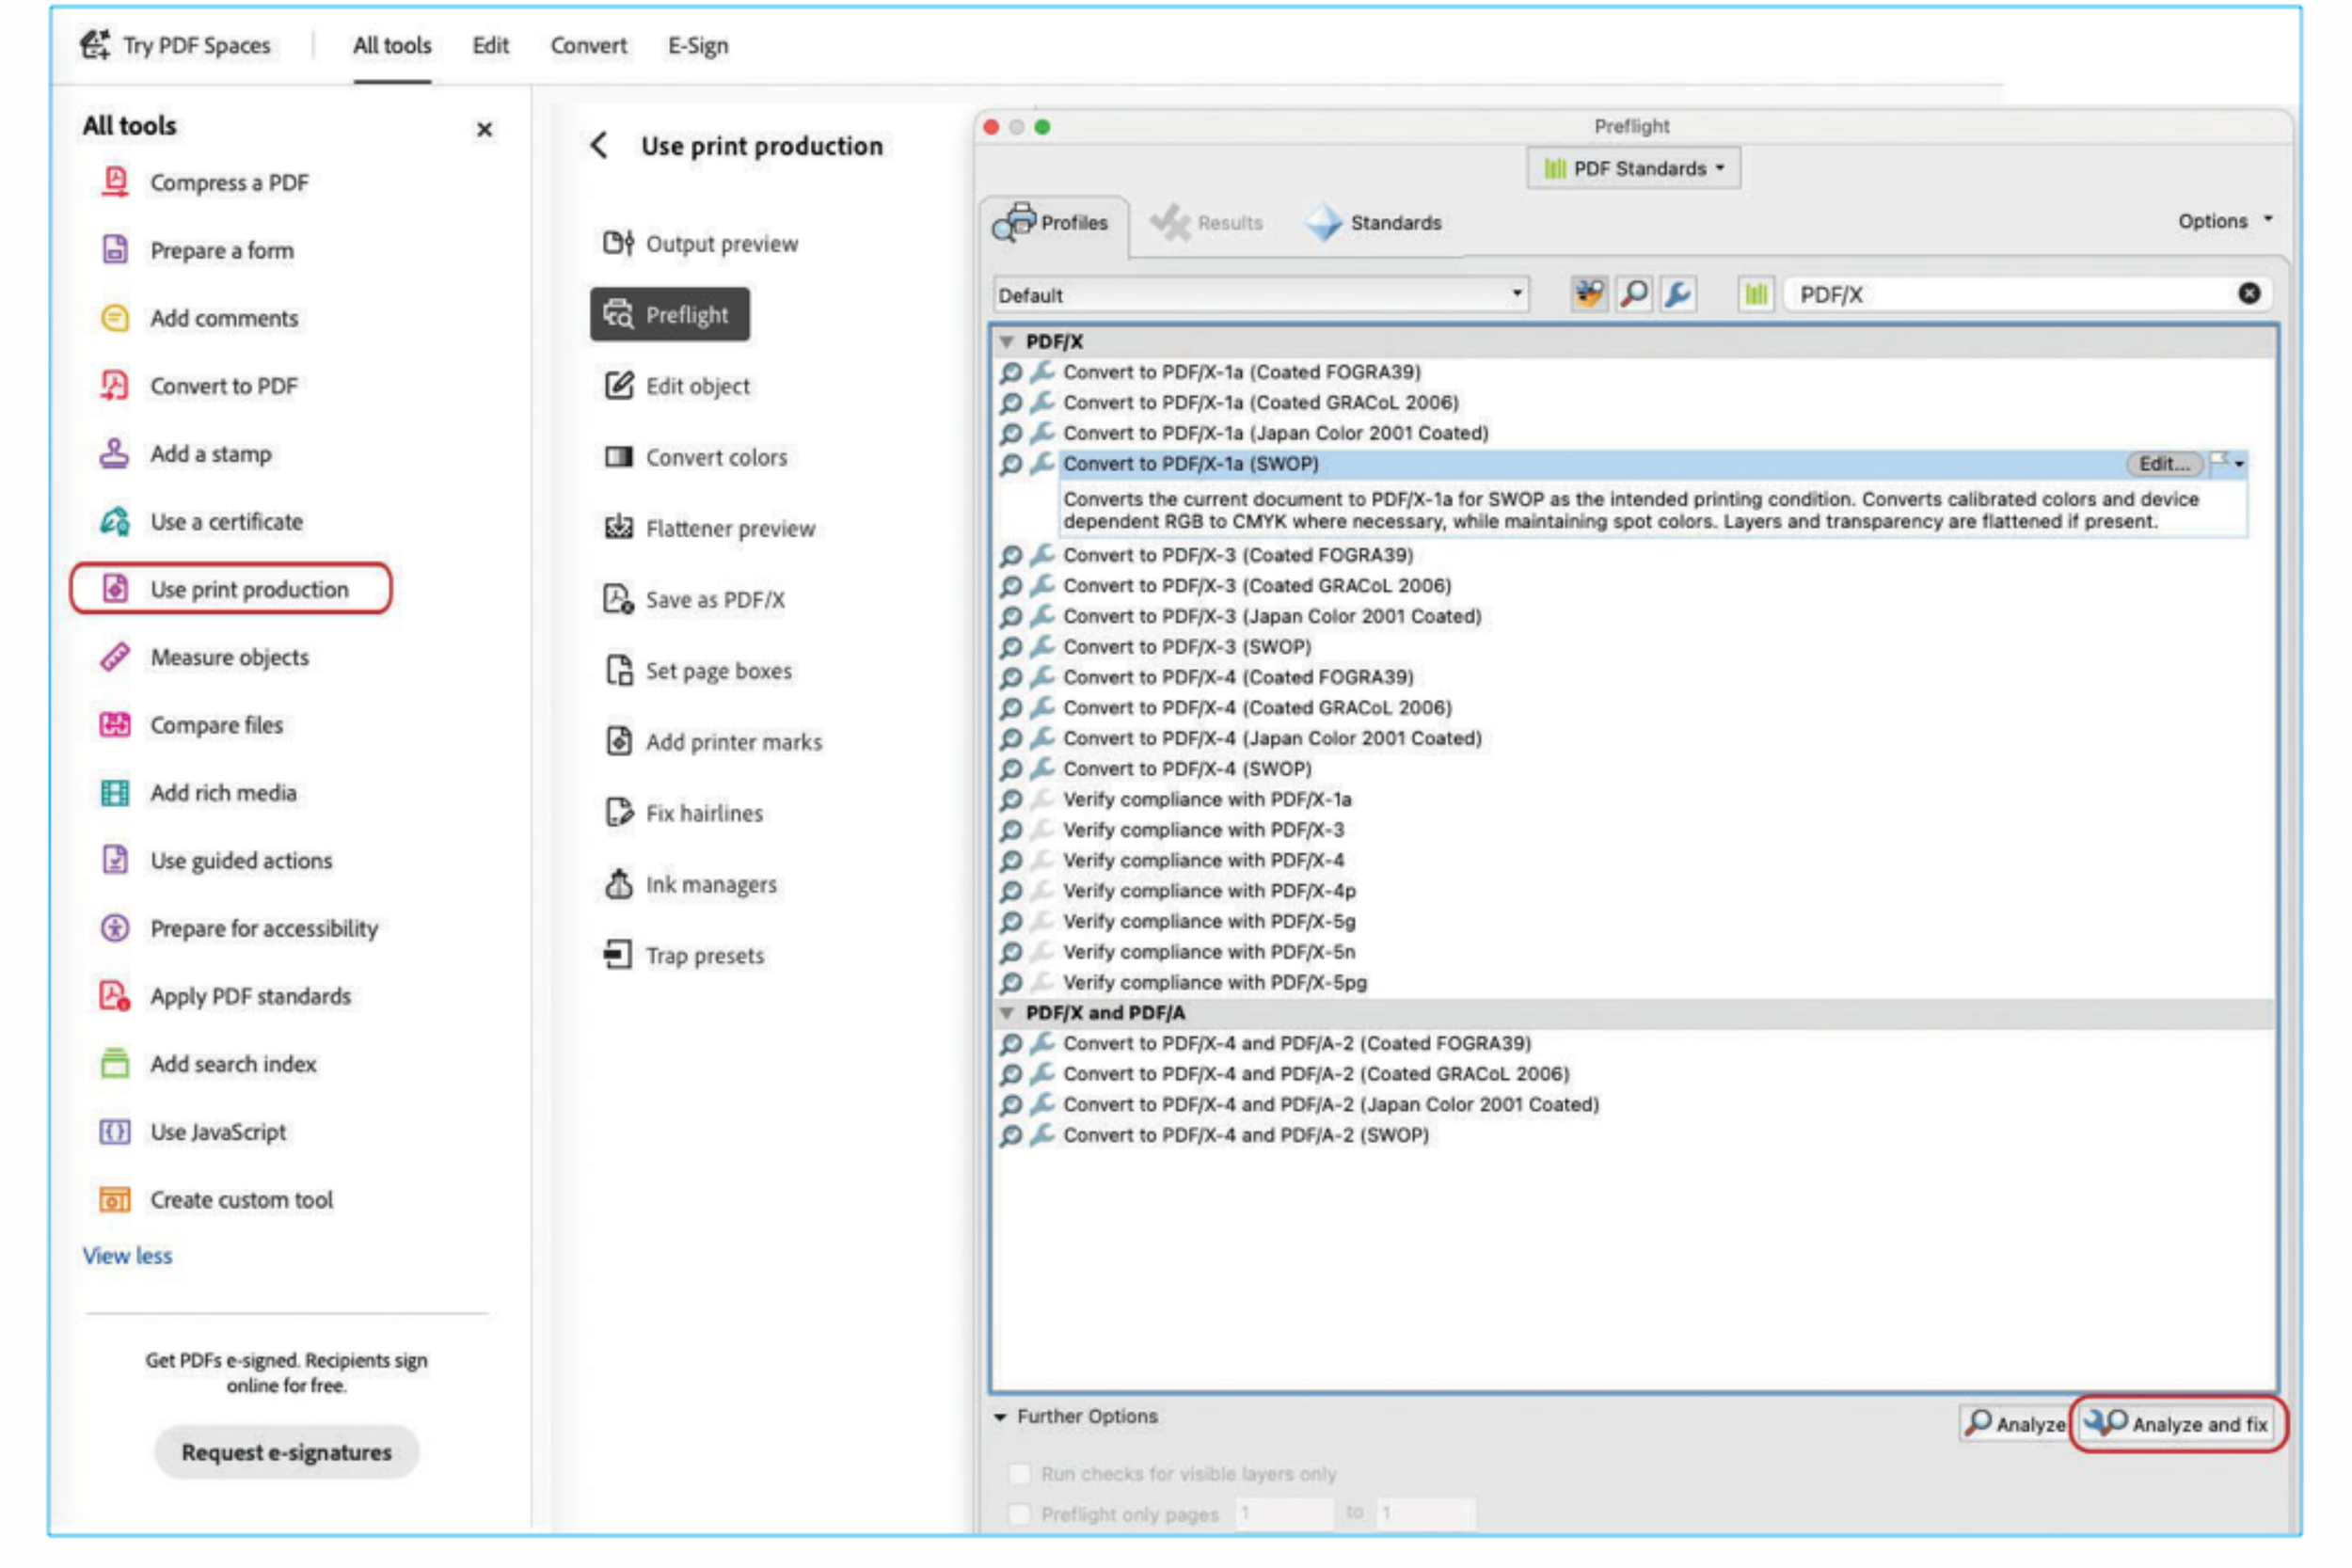
Step 3: Convert the File to PDF/X
With your saved Press Quality PDF file still open:
Go to Tools
Open Print Production
Click Preflight
Choose Convert to PDF/X-1a
Click Analyze and Fix
✅ If you don’t immediately see PDF/X-1a, use the search box in the Preflight window and type PDF/X. A display box will show the option.
Acrobat will automatically do the behind-the-scenes work that printers need—like embedding fonts and adjusting print settings.
What if Acrobat flags an issue?
Click the Fix option, then click Analyze and Fix again to confirm the issue is resolved.
If an issue remains, don’t worry—send the file to AV Graphics for review.
Many flagged issues are minor and easily resolved by our prepress.
Step 4: Save Your Final Print-Ready File
Save the file as ProjectName_PRINT_READY_PDFX.pdf. This is the final file to send to print.
✅ You’re done.
Need Help?
Not sure if your file is ready to print? AV Graphics offers FREE file review before printing. Our prepress team can:
✅ Check your PDF for print-readiness
✅ Identify potential issues before production
✅ Provide guidance on corrections
✅ Ensure your files meet our specifications
Contact us today!